Environment Manager
This page refers to an older version of the product.
View the current version of the User Help.
EMP Migrate Utility
The Environment Manager Personalization Migrate Utility (EMP Migrate Utility) is a standalone tool that allows user data to be copied from a source database to a target database, mapping the user names to the target domain and adjusting saved registry settings accordingly. The utility contacts the respective databases directly and does not use existing personalization servers.
The utility checks the personalization group of each user that it encounters on the source database with a group of the same name on the target database. If incomparable data exists whereby users or groups are listed on the source but not the target databases, an Import/Export operation from the Environment Manager console has to be performed to align both the source and target databases. When the comparison is complete you can view an output summary by clicking View Log.
The following table shows the EMP Migrate Utility version requirements for source and target databases.
| EMP Migrate Utility Version | Source Version | Target Version |
| 8 FR4 | 8.1, 8.2, 8.3 or 8 FR4 | 8 FR4 |
| 8.5 | 8.5 | 8.5 |
| 8.6 | 8.5 or 8.6 | 8.6 |
| 10.x | 10.x or later | 10.x |
For more information, see Import and Export Configurations.
Usage counts are not transferred for applications so the count starts again on the new database. Therefore transferred applications do not appear on the Application Usage report. Usage counts for discovered applications are set to one on transfer and appear on the Discovered Application report.
Usage Scenario
Typical usage of the EMP Migrate Utility can be when a specific user or group requires access to, for example, a User Acceptance Testing (UAT) environment for testing a particular application. The EMP Migrate Utility can be used to migrate the users existing personalization data from a UAT database into the production database to ensure the user has a consistent experience in both environments.
Another example is when a specific user is moving from one region to another, the EMP Migrate Utility can be used to migrate the users personalization data ahead of time to ensure that the user has a consistent experience in the new location.
Run the EMP Migrate Utility
- Select Start > All Programs > Ivanti > Environment Manager > Tools > EMP Migrate Utility.
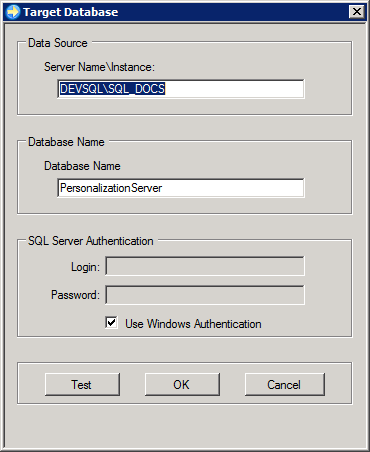
- In the Target Database dialog, enter the following information for the target database that will receive data:
- SQL Server Name\Instance
- SQL Database Name
User ID and Password (or select Use Windows Authentication to use the current Windows identity)
The user must have sufficient privileges to modify data in the tables directly in the database. The service account user (used by Personalization Servers) is not sufficient, as this only has permission to run stored procedures.
-
Click OK to connect and display the console.
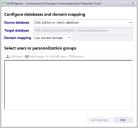
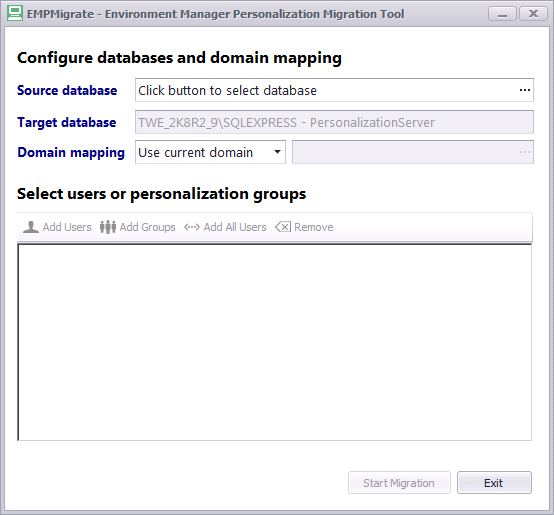
- Click the ellipsis (...) to select the Source database.
- Select the domain mapping from the Domain mapping drop-down menu:
- Use current domain- The domain in which the utility is running is used
- Map to new domain- Use the ellipses to select the domain or enter the NetBIOS name of the domain directly into the field.
No domain mapping- Users are not modified if this option is selected. This is useful for combining databases in the same domain.
If domain mapping is used, the domain of all selected users is altered to the target database, regardless of the previous values. The utility must be able to look up the SID of each user in the target domain.
The utility does not add the users to Active Directory for the target domain.
- Select the users you want to add using the following options:
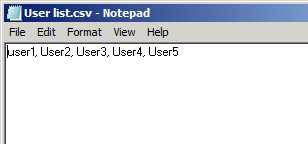
- Add Users - Select users from available groups. Enter the name, optional domain or select a user group and click Search to display the users within that group.
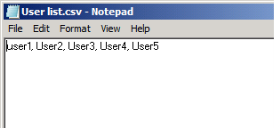
Click the Load file... button to load a list of users from a CSV file. Each user must be separated by a comma:
- Add Groups - Select all users from a group.
- Add All Users - Select all available users from the database.
- Users and groups can be taken out of the migration using the Remove button.
- Once all the required users have been added, click OK.
-
Click the Start Migration button to display the Migration Options.
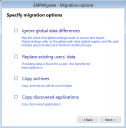
- Use the check boxes to apply the following settings:
- Ignore global data differences - If any global data differences exist between the source and target databases the tool will ignore these discrepancies and proceed with the migration. Global data refers to the global path data, such as global registry file path includes and excludes and Windows Setting Groups.
- Replace existing users' data - If the same user is found for a user, the old data is deleted and replaced by the source data. If unchecked the old data is not replaced.
- Copy archives - Archive data as well as current data is transferred.
- Copy discovered applications - Discovered applications are transferred.
- Click Next to start the transfer.
-
A processing dialog displays, showing the number of transfers which pass and fail.
-
When complete, the Error and View Logs can be scrutinized using the available buttons. The logs are written to the current user's Documents folder.
-
Once you have migrated the data, you can launch the Personalization Analysis tool on the target database to see the data exist for the migrated user.
The EMP Migrate Utility does not remove the users data from the source database.
Related Topics